Mastering Custom SageMaker Deployment: A Comprehensive Guide
December 24, 2024
Introduction
Recently, I embarked on what I initially thought would be a straightforward
journey: deploying a custom BERT-style model, trained on Databricks and packaged
by MLflow, to Amazon SageMaker. Little did I know that this endeavor would lead
me down a rabbit hole of CUDA errors, SageMaker-specific arguments, and
scattered documentation. This two-week journey of dissecting SageMaker internals
and scouring the web for information has equipped me with valuable insights that
I’m eager to share. Consider this post your guide if you ever find yourself in a
similar predicament.
The Scenario
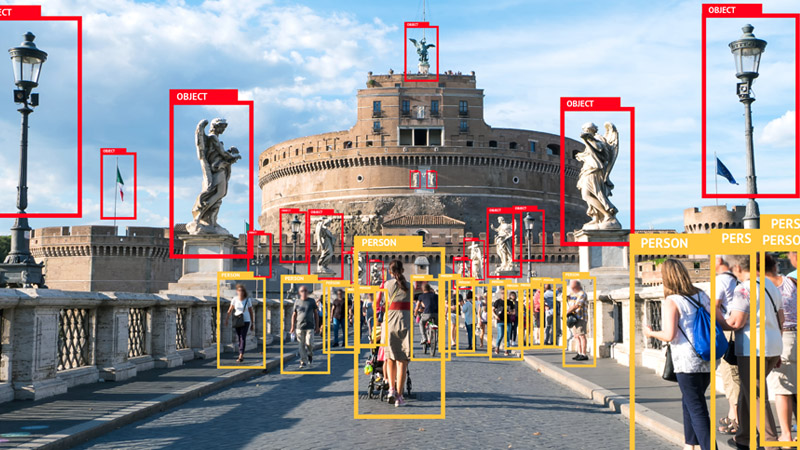
Imagine a BERT-style model trained for token classification (essentially Named
Entity Recognition or NER), enhanced with post-processing steps to refine its
output by eliminating false positives based on a predefined list of terms. This
model was developed on Databricks, leveraging its seamless MLflow integration
for experiment tracking and logging. To maintain consistency, we opted to
package the model as an MLflow bundle with a
custom class encapsulating all
necessary post-processing steps, with the intention of deploying it to SageMaker
directly via MLflow.
Our initial approach was to use MLflow’s built-in method for creating a
SageMaker-compatible image:
mlflow sagemaker build-and-push-container
This command is designed to generate a SageMaker-compatible image for seamless
deployment. However, we quickly discovered a significant limitation: the
resulting image is CPU-only, unsuitable for our Large Language Model (LLM) needs
(Yes, BERT is an LLM). This realization necessitated a pivot to manually
creating and pushing our own GPU-enabled image to Amazon Elastic Container
Registry (ECR) for SageMaker deployment.
Diving into the Deep End
The Dockerfile Dilemma
Creating a Dockerfile is typically straightforward, but SageMaker introduces its
own set of requirements and nuances. Key questions emerged:
- What should be the entrypoint?
- Are there CUDA version restrictions?
- How does SageMaker execute the Docker image?
These uncertainties weren’t immediately clear from the available documentation.
Initial Attempts and Roadblocks
Drawing inspiration from a colleague’s SageMaker deployment Dockerfile, which
curiously lacked an entrypoint, I initially opted for nvidia/cuda as the base
image and attempted to use MLflow for model serving:
FROM nvidia/cuda:11.8.0-cudnn8-runtime-ubuntu20.04

# Install Python and necessary packages
RUN apt update && apt install -y python3 python3-pip
RUN pip install mlflow==2.15.1 transformers torch sagemaker

# Set the entrypoint
ENTRYPOINT ["mlflow", "models", "serve", "-m", "/opt/ml/model", "-h", "0.0.0.0", "-p", "8080"]
This approach, however, led to an unexpected error regarding an unknown serve
argument. After some investigation and experimentation, including removing the
entrypoint entirely, we encountered more cryptic errors, suggesting deeper
issues with our container configuration.
Going Fully Custom
After hitting multiple dead ends, I decided to take a step back and rethink our
approach. The next day, I opted to drop the use of MLflow for serving and
instead create a custom API inside the Docker image using FastAPI. We would
still use MLflow to load the model file, as our post-processing logic was
defined there. This approach allowed me to test the image locally, and it worked
fine. However, once deployed to SageMaker, we encountered the same serve
error.
This persistent issue prompted a deeper investigation into how SageMaker
actually starts these containers. The AWS documentation, unfortunately, didn’t
provide a clear, consolidated answer. Ironically, it was AWS’s Q AI that
provided the crucial information, outlining exactly how SageMaker starts
containers and what the requirements are for a container to work properly.
The SageMaker Container Startup Revelation
The key revelation was that SageMaker passes the serve argument when starting
the container:
docker run image_name --volume /path/to/model:/opt/ml/model serve
This insight was a game-changer. It explained why our previous attempts failed
and provided a clear direction for our solution. To handle this, we needed to
make our entrypoint a shell script that could correctly consume and handle
passed arguments.
Unraveling SageMaker’s Requirements
Through further research and experimentation (mostly bugging Q about it), we
pieced together the following requirements for a SageMaker-compatible container:
-
API Endpoints: The container must expose two specific endpoints:
/invocations for handling prediction requests/ping for health checks
-
Port Binding: The Docker image must be labeled to accept port binding, as
SageMaker dynamically changes the deployment port.
-
Port Configuration: The server inside the container should use the port
specified in the SAGEMAKER_BIND_TO_PORT environment variable.
-
Custom Inference Script: We need to inform SageMaker that we’re using a
custom inference script by specifying its name as an environment variable
when creating the Model object.
 from sagemaker.model import Model
 model = Model(
     image_uri='224534533583.dkr.ecr.us-east-1.amazonaws.com/custom-image:tag',
     role='arn:aws:iam::224534533583:role/service-role/AmazonSageMaker-ExecutionRole-20211224T123456',
     model_data='s3://bucket/model.tar.gz',
     env={'SAGEMAKER_PROGRAM': 'inference.py'} # Custom inference script
 )
These requirements led us to create the following files:
entrypoint.sh
#!/bin/bash

# Set the default port to existing sagemaker set environment variable or default to 8080
PORT=${SAGEMAKER_BIND_TO_PORT:-8080}

# start the API server
# yes the use of exec is actually necessary here
exec uvicorn inference:app --host 0.0.0.0 --port $PORT --workers 4
inference.py
import mlflow.pyfunc
from fastapi import FastAPI, HTTPException
from pydantic import BaseModel
from typing import List, Dict, Any

app = FastAPI()

# Load the model from the default SageMaker model directory
model = mlflow.pyfunc.load_model("/opt/ml/model")

class PredictionRequest(BaseModel):
    text: List[str]

class PredictionResponse(BaseModel):
    predictions: List[Dict[str, Any]]

@app.get("/ping")
def ping():
    return {"status": "ok"}

@app.post("/invocations", response_model=PredictionResponse)
def predict(request: PredictionRequest):
    try:
        predictions = model.predict(request.text)
        return PredictionResponse(predictions=predictions)
    except Exception as e:
        raise HTTPException(status_code=500, detail=str(e))

if __name__ == '__main__':
    import uvicorn
    import os
    port = os.environ.get("SAGEMAKER_BIND_TO_PORT", 8080)
    uvicorn.run(app, host='0.0.0.0', port=port)
requirements.txt
mlflow==2.15.1
cloudpickle==2.2.1
fastapi
uvicorn
pydantic
transformers
Additional Challenges
Even with these requirements in place, we faced two more significant hurdles:
-
CUDA Version Issues: We found that the CUDA version of the Docker image
needed to match (at least on major versions) with the instance type’s CUDA
version. This was particularly challenging as CUDA versions for instance
types are not documented anywhere as usual.
-
Python Version Compatibility: We discovered that the Python version,
along with some dependencies like MLflow and cloudpickle, needed to match the
versions used during model packaging. This led to our decision to use pyenv
in the Dockerfile to ensure we had the correct Python version.
These additional considerations resulted in our final, more complex Dockerfile:
FROM nvidia/cuda:11.4.3-runtime-ubuntu20.04

# sagemaker labels
LABEL com.amazonaws.sagemaker.capabilities.accept-bind-to-port=true

# install system build dependencies (required by pyenv)
ENV HOME="/root"
ENV DEBIAN_FRONTEND=noninteractive
WORKDIR ${HOME}
RUN apt update && apt install -y \
        build-essential \
        curl \
        git \
        libssl-dev \
        zlib1g-dev \
        libbz2-dev \
        libreadline-dev \
        libsqlite3-dev \
        lzma \
        liblzma-dev \
        libbz2-dev \
        wget \
        xz-utils \
        tk-dev \
        libffi-dev \
        python3-dev \
        gnupg

# cleanup to reduce image size
RUN apt clean && rm -rf /var/lib/apt/lists/*

# install pyenv
RUN git clone --depth=1 https://github.com/pyenv/pyenv.git .pyenv
ENV PYENV_ROOT="${HOME}/.pyenv"
ENV PATH="${PYENV_ROOT}/shims:${PYENV_ROOT}/bin:${PATH}"

# install correct python version
ENV PYTHON_VERSION=3.11
RUN pyenv install ${PYTHON_VERSION}
RUN pyenv global ${PYTHON_VERSION}

# install compatible pytorch version
RUN pip install torch torchvision torchaudio --index-url https://download.pytorch.org/whl/cu118

# Install necessary Python packages
COPY ./requirements.txt .
RUN pip install -r requirements.txt

# copy code
COPY . /app
WORKDIR /app

# Define the entry point for the container
RUN chmod +x entrypoint.sh
ENTRYPOINT ["./entrypoint.sh"]
Building and Pushing the Image to ECR
With the Dockerfile and associated files in place, we were ready to build and
push the image to Amazon ECR. The final directory structure looked like this,
with each file serving a specific purpose:
.
├── Dockerfile         # Contains all the build instructions and environment setup
├── entrypoint.sh     # Script that handles container startup and server initialization
├── inference.py      # FastAPI application with SageMaker-required endpoints
└── requirements.txt  # Python package dependencies needed for the model
To build and push our image to ECR, we used an EC2 instance with sufficient
resources. make sure you have docker and AWS cli installed and configured on the
instance, Here’s the step-by-step build process:
- create an ECR repository if you haven’t already:
aws ecr create-repository --repository-name custom-image --region us-east-1
docker build -t 224534533583.dkr.ecr.us-east-1.amazonaws.com/custom-image:tag .
- Authenticate Docker to ECR:
aws ecr get-login-password --region us-east-1 | docker login --username AWS --password-stdin 224534533583.dkr.ecr.us-east-1.amazonaws.com
docker push 224534533583.dkr.ecr.us-east-1.amazonaws.com/custom-image:tag
Make sure to replace the account ID (224534533583) and region with your own.
The process might take a while depending on the image size and network speed
(very long for cuda based images).
Deploying the Model
With the image successfully pushed to ECR, we were ready to deploy the model to
SageMaker. We used the following Python code to create the Model object and
deploy it:
from sagemaker.model import Model

# Define your Docker image URI and S3 path to model artifacts
docker_image_uri = '224534533583.dkr.ecr.us-east-1.amazonaws.com/custom-image:tag'
model_artifacts = f"s3://bucket_name/path/to/model.tar.gz"
role_arn = "arn:aws:iam::224534533583:role/service-role/AmazonSageMaker-ExecutionRole-20211224T123456"

# Create a SageMaker model
model = Model(
    image_uri=docker_image_uri,
    model_data=model_artifacts,
    role=role_arn,
    sagemaker_session=sagemaker_session,
    env={'SAGEMAKER_PROGRAM': 'inference.py'}
)

# Deploy the model to an endpoint
model.deploy(
    initial_instance_count=1,
    instance_type='ml.p3.2xlarge' # cuda 11.4
)
Testing the Deployment
With the model deployed, we can finally test it by sending a sample request to
the endpoint. We used the following Python code to send a sample request to the
deployed endpoint:
import boto3
import json

# Create a SageMaker runtime client
client = boto3.client('sagemaker-runtime')

# Define the endpoint name (can be found in the SageMaker console)
# generally in the form of 'custom-image-endpoint-20211224123456'
endpoint_name = 'custom-image-endpoint'

# Define the sample request
request = {
    'text': ['This is a sample text']
}

# Send the request to the endpoint
response = client.invoke_endpoint(
    EndpointName=endpoint_name,
    Body=json.dumps(request),
    ContentType='application/json'
)

# Parse the response
response_body = json.loads(response['Body'].read().decode())
print(json.dumps(response_body, indent=2))
Conclusion
This journey through the intricacies of custom SageMaker deployment has been
both challenging and enlightening. It underscores the complexity of deploying
sophisticated machine learning models in cloud environments and the importance
of understanding the underlying infrastructure. Key takeaways from this
experience include the critical nature of proper documentation (if anyone from
AWS is reading this), and the value of persistence in problem-solving. We’ve
learned that successful deployment often requires a deep dive into system
internals, a willingness to experiment, and the ability to piece together
information from various sources. This process has not only resulted in a
working solution but has also equipped us with valuable knowledge for future
deployments. Developing the model that was deployed is another story for another
blog post when I’m bored enough to recreate it with non proprietary data
(brainrot classifier?).